Brand: | OEM |
Model: | TAM 146040-2 |

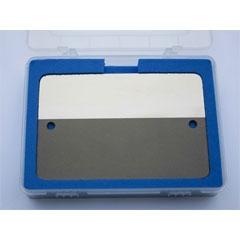
The Hoffmann PT Panel is made from a 0.100" (2.5mm) stainless steel plate. Half of the test surface is hard coated with 0.003" hard alloy chrome. Five crack centers are evenly spaced in the hard coated strip. The crack centers are circular patterns forming a star. The un-plated side is grit blasted to Ra = 2.0 roughness for washability / background tests.
Photo Certification is provided with each panel.
P&W TAM 146040-2 Approved
Intended Use of the PT Panel:
The TAM Panel serves the user in their PT tests for the functional control of complete penetrant process.
Description:
The TAM Panel is a stainless steel plate. Half the test surface is hard coated. Five crack centers are evenly spaced in the hard coated strip. The crack centers are circular patterns forming a star. The un-plated portion of the TAM panel has been grit blasted to a uniform surface roughness ideally suited for evaluating residual penetrant background characteristics. R2 = 2.0 µm.
Application:
The penetrant to be checked is applied onto the entire surface of the TAM panel by immersing, spraying or brushing. After the prescribed penetrant dwell time, the excess penetrant is removed. The excess penetrant removal depends on the type of penetrant. Rinse off with water or wipe it off with a clean, lint-free wiping material, barely dampened with cleaner. Afterwards, the surface is dried. Finally, the developer is applied. After 5 to 10 minutes, the evaluation is carried out. In the hard coated strip, the judgment is based on the number of visible crack centers. The un-coated portion of the panel is used to check the excess penetrant removal by evaluating the amount of remaining penetrant.
Cleaning:
For a correct indication, the TAM panel must be free from dirt and residual penetrant from former checks. The TAM panel should be carefully cleaned to remove residual penetrant and developer.
Storage:
After the panel has been cleaned and dried, it should be stored, submerged in a cleaning solvent like acetone or isopropyl alcohol. Recalibration in 12 month
Intervals:
The star shaped defects of the TAM panel may change in size and display capability by dirt, corrosion or mechanical stress. Intervals for reconditioning and recalibration: With minimal use – 12 months. All TAM panels are serial numbered and supplied with photos and a calibration certificate.
| Units | Discount | Unit Price |
|---|---|---|
| 1 | - | RM 7,750.99 |